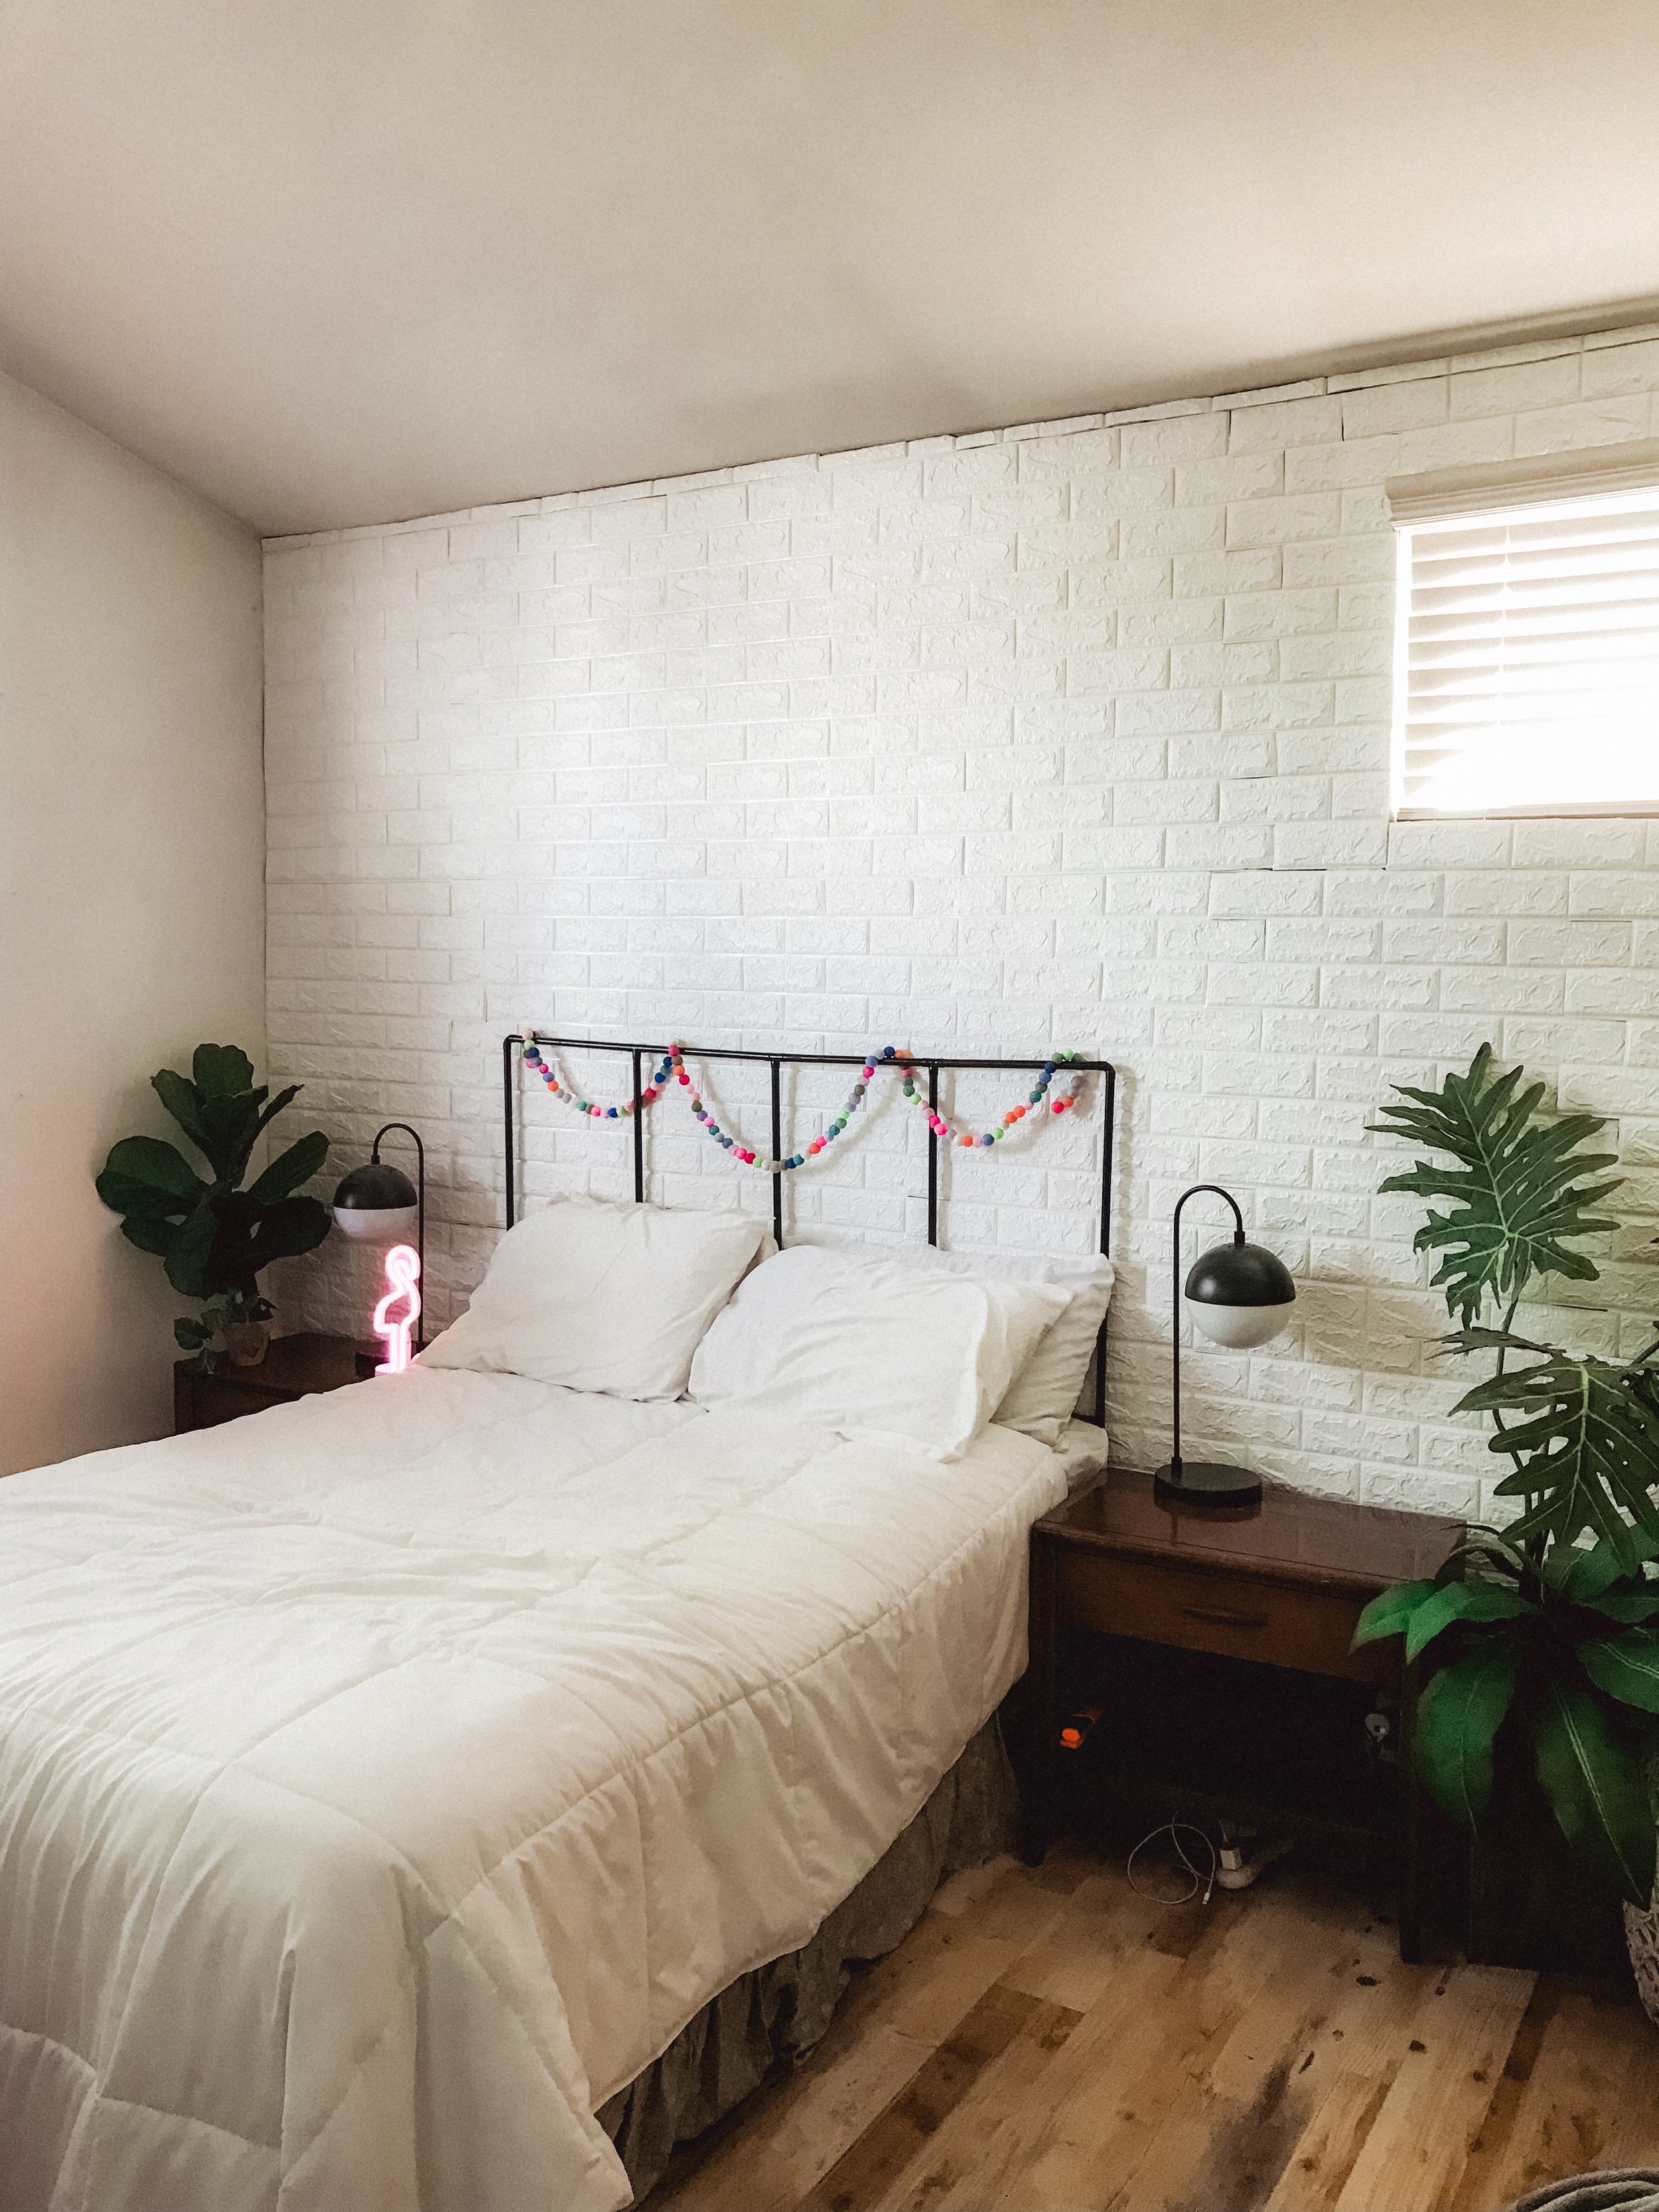
TEMPORARY BRICK WALL (OR WALLPAPER) FOR RENTERS
The wall of my bedroom is the part I was the most excited to update. You can see the before picture in my first renovation post here. I love having all white walls and lots of clean, light-filled space, so I was really struggling to figure out how to fit the green and pink wall in with the rest of my style. Since paint isn't an option, I considered temporary wallpaper, but I'm always a little nervous that "temporary" adhesives aren't going to actually be as temporary as they sound. I'm sure there are some great brands that work perfectly, but I didn't want to risk it (because how would I know for sure until I try to take it down?!).
I thought about covering the wall with a giant tapestry (not totally my style either) or even creating huge panels out of foam or plywood, covering them with fabric or paper or paint and setting those against the wall (could work!). But one day, thanks to Erin Spain and Pinterest, I found the perfect solution. Apparently Erin read about this idea in an old Lonny Magazine and it seemed fool-proof to me!
THE CONCEPT:
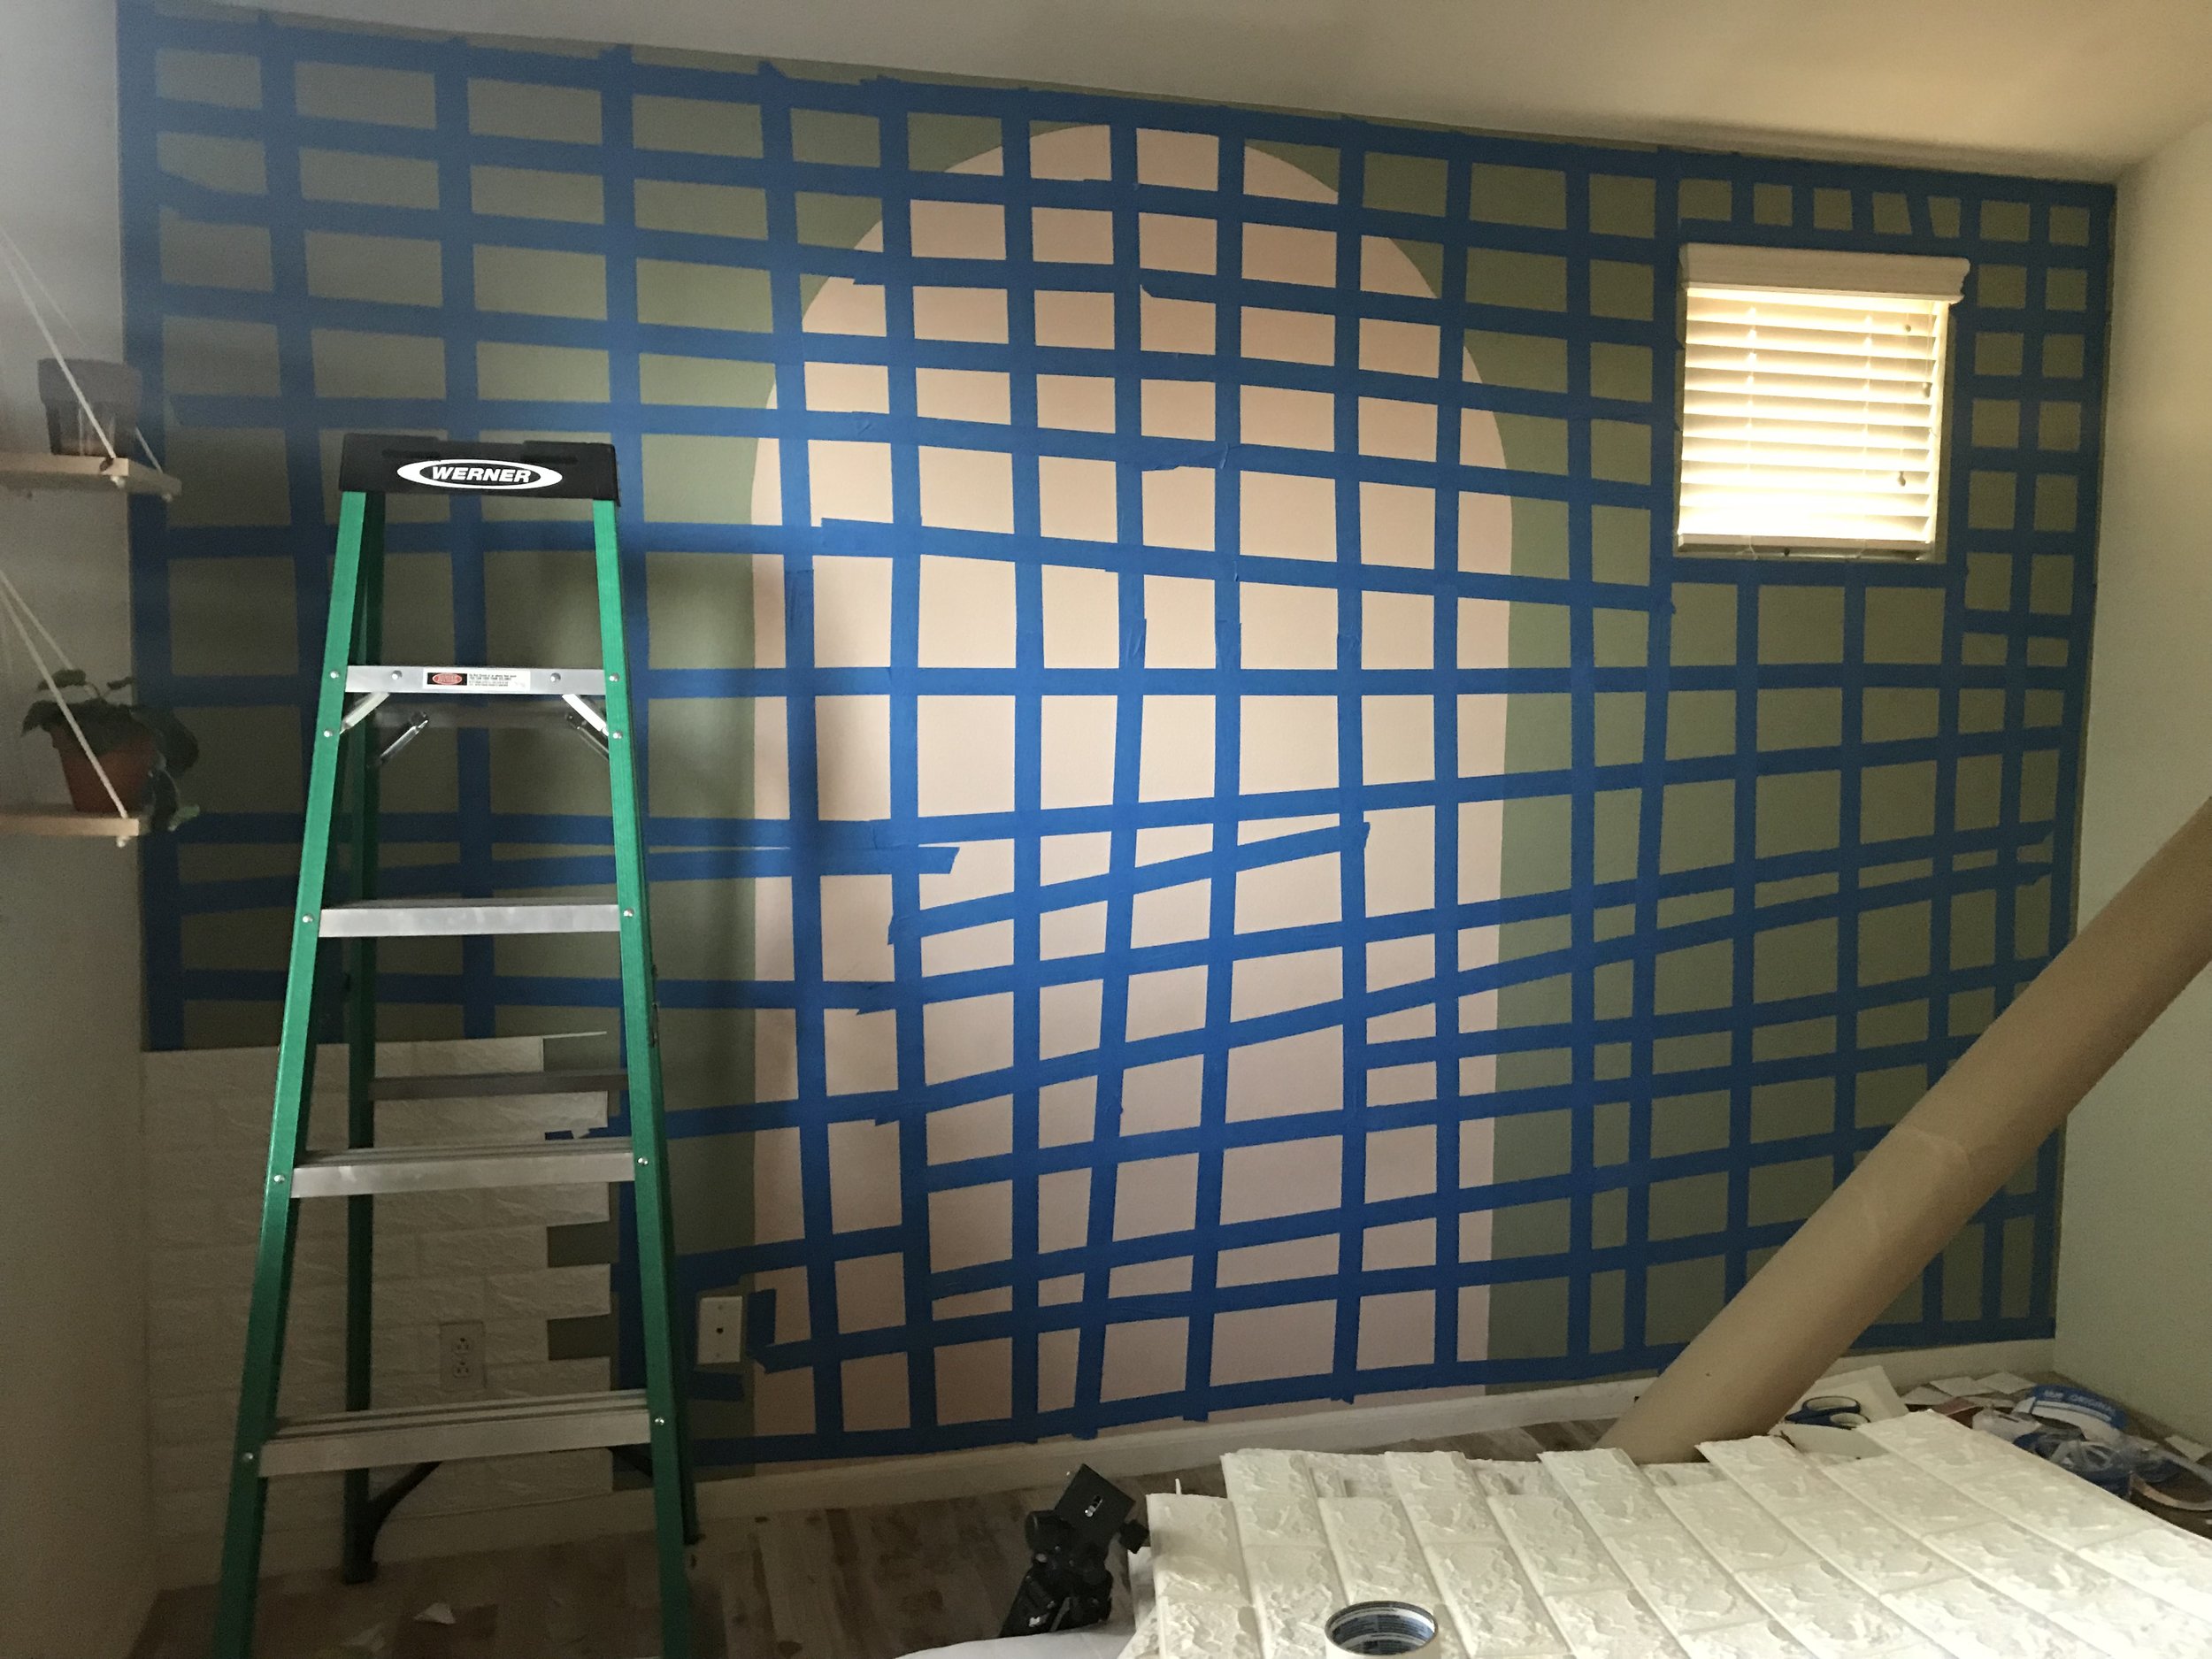
So basically, the idea is that you cover the wall in a painter's tape grid. Painter's tape is literally MADE FOR sticking it to the wall and then taking it off later, so the painter's tape for sure won't do any damage. Then, when you add the wallpaper, or in my case the foam bricks, you stick it to the tape, not to the wall! Since the painter's tape is the only thing actually touching the wall, it should peel off no problem months or years later. I feel like it's kind of a nice way to save on the hassle of installation even if you don't need it to be temporary, hah!
I had a few concerns before starting -- this technique was meant for wallpaper, but foam bricks are heavier than paper, so I wasn't sure if the tape would be able to hold them without peeling off. I was also dealing with panels that had to line up perfectly, not just strips of paper, so I wasn't sure if one non-sticky part would cause the whole panel to start to fall.
Similarly to the temporary floor I added, you can tell that the finished wall is temporary and not the same quality as a real installation would be, but I'm still really happy with the results and so glad I decided to try it.
THE PROCESS:
I ordered these bricks on Amazon. They weren't my first choice because they look pretty cheap, in my opinion, but they also are pretty cheap and I'm still on a struggling-20-something budget. These faux bricks were my first choice, so if you have the budget, you should get these just for me :) The cheaper ones that I ordered still did the job and honestly looked better in real life than I expected.
The first step was creating the painter's tape grid. It doesn't need to be straight or measured or anything, the idea is just that you cover a good amount of the wall surface with tape. In hindsight, I wish I had made the grid a bit tighter to put more tape on the wall. I thought it would be no problem to add in pieces of tape here and there at the end for anywhere that needed some, but actually, the strength of the tape is in the length -- so the tiny pieces of painter's tape that I added at the end for the few missed bricks didn't end up holding and peeled right off with the pull of the brick. Since you can't really fix your tape mistakes after the fact (unless you want to redo a lot of work), make sure to use long pieces of tape, and cover as much of the wall as possible. You'll have to stick down all of the corners if you want it too look great, not just the center of the panel. If you're just using wallpaper, not a thicker material like the foam bricks, then you'll probably have more flexibility in this area.
Side note: most foam bricks actually come with an adhesive on the back, so they're made to work as peel-and-stick panels, but I left the paper backing on so that I could control where they stuck and make sure it was only onto the tape, not the wall. I used double sided adhesive squares on the backs of the panels (similar to these, and I cut each square into about 9 pieces to make smaller squares).
Challenge #2: Since the bricks come in rectangular panels (I used about 20 panels), if I had put them on the wall directly you would be able to see the seams where each panel started and ended (hmph), and I wanted it to look as real as possible, with no visible seams. A lot of people online suggested cutting out every other brick so that each panel would interlock. Before seeing the panels in person, I worried that that would be pretty difficult, but they're super lightweight -- like paper on top of a thin, squishy foam, so they were very easy to cut with just everyday scissors. It was a bit tedious but not hard, and totally worth it.
The last challenge was cutting the panels around outlets, a window and the uneven ceiling. Fun fact: most ceilings aren't perfectly straight (lots of people warned me about this), so I had to cut individual tiny pieces out to stick along the very top of the wall to align with wherever the ceiling was at that point. Since scissors were working great to easily cut the brick, none of this was very difficult, just something to think through ahead of time.
I miscalculated at one point and thought for a few minutes that I hadn't ordered enough brick (I had!), so I started working in a more random order so that if I ran out before I had covered the wall, the uncovered part would be right behind my bed where you couldn't see it. It was kind of a smart idea, but it turns out I had plenty of brick (not sure what happened there), and doing it that way threw off my alignment a little bit (because of the uneven ceiling). I would recommend starting by completing the entire bottom row and then working your way up to the ceiling to make sure everything lines up. Then any odd lines can just be cut off the top. I ended up having to cut a few bricks in the middle to line up since I worked from the bottom up and the top down simultaneously.
THE RESULT:
It's been a few weeks since we added the bricks and I am in love! Like I mentioned earlier, a few bricks did not stay stuck down where I tried to add the tape afterwards (this could be fixed -- I would just have to take some of the panels down and add longer pieces/redo some of it), but it doesn't look too bad as is, and every part that I did "correctly" has stayed "stuck" perfectly! It completely changes the room and looks more real than I expected. I've heard of people painting the panels with a distressed look to make them look even more realistic.
I tried hanging a picture frame on the wall the other day to see how that would go -- it worked really well... you just need to either use a longer pin/nail/tack so that it goes all the way into the actual wall, not just through into the foam, or make sure to pin into the seams between bricks where its just paper thin.
I would highly recommend this method! I want to try it next in our kitchen with a fun backsplash look and eventually with wallpaper around other parts of the house.
ps I added the DIY headboard in soon after finishing the wall... post on that coming soon!
TIPS FOR HARDWARE-STORE-A-PHOBIA:
I'm starting to include this section in every post for those who (like past Julie) don't do projects just because they're afraid of "tools" and hardware stores, but for this project, you really don't even need to go to a hardware store at all.
1. You need foam brick panels (very common -- lots of options out there!), painter's tape, double sided adhesive and scissors. That's it!
2. Remember that if you cut out every other brick so that the panels interlock, they will cover less space than they cover as is. Make sure to order a little extra to make up for that!
This post contains affiliate links.


