
Dresser Upcycle: How To Get A Light Natural Wood Look

I just finished this fun dresser upcycle and wanted to share all of the steps and materials because it was a little bit more complicated than I expected in order to really do it well and get the exact vision I had in mind.
I started with this older orangey hand-me-down dresser that we’ve had for a few years! I wanted something that felt more modern and also that matched our temporary/renter-friendly light wood floor.

Initially I planned to just sand it down and add whatever cheap clear coat on top — easy peasy — but I ran into two problems:
PROBLEM #1: The top and sides of the dresser turned out to be really hard laminate over soft particle board, not real wood, so it was very hard to sand and even if I had continued that route, the particleboard underneath would have looked terrible and held up terribly.
PROBLEM #2: Even on the true wood drawers which sanded down really nicely, applying just a clear coat on top actually made them look much darker and more orange, even though it was technically a clear coat (like how it would look if it were wet). I really didn’t like that — and I really just wanted it to look completely natural because I loved the natural wood before the gross clear coat ruined it!
After a few text messages to my woodshop-savvy sources and this amazing YouTube video, I was able to achieve the look I wanted! Here are the correct steps if you want to get a similar look:

MATERIALS I USED:
Electric Belt Sander: RYOBI Portable Belt Sander
Coarse Sand Paper: 50 Grit Sanding Belt
Finer Sand Paper: 80 Grit Sanding Belt
Super Fine Sand Paper: 400 Grit Sand Paper
Water-Based White Stain: Varathane Tintable Base
Water-Based Polyurethane: Varathane Clear Matte
White Paint: Glidden Paint + Primer
Wood Wax: Howard Feed-N-Wax
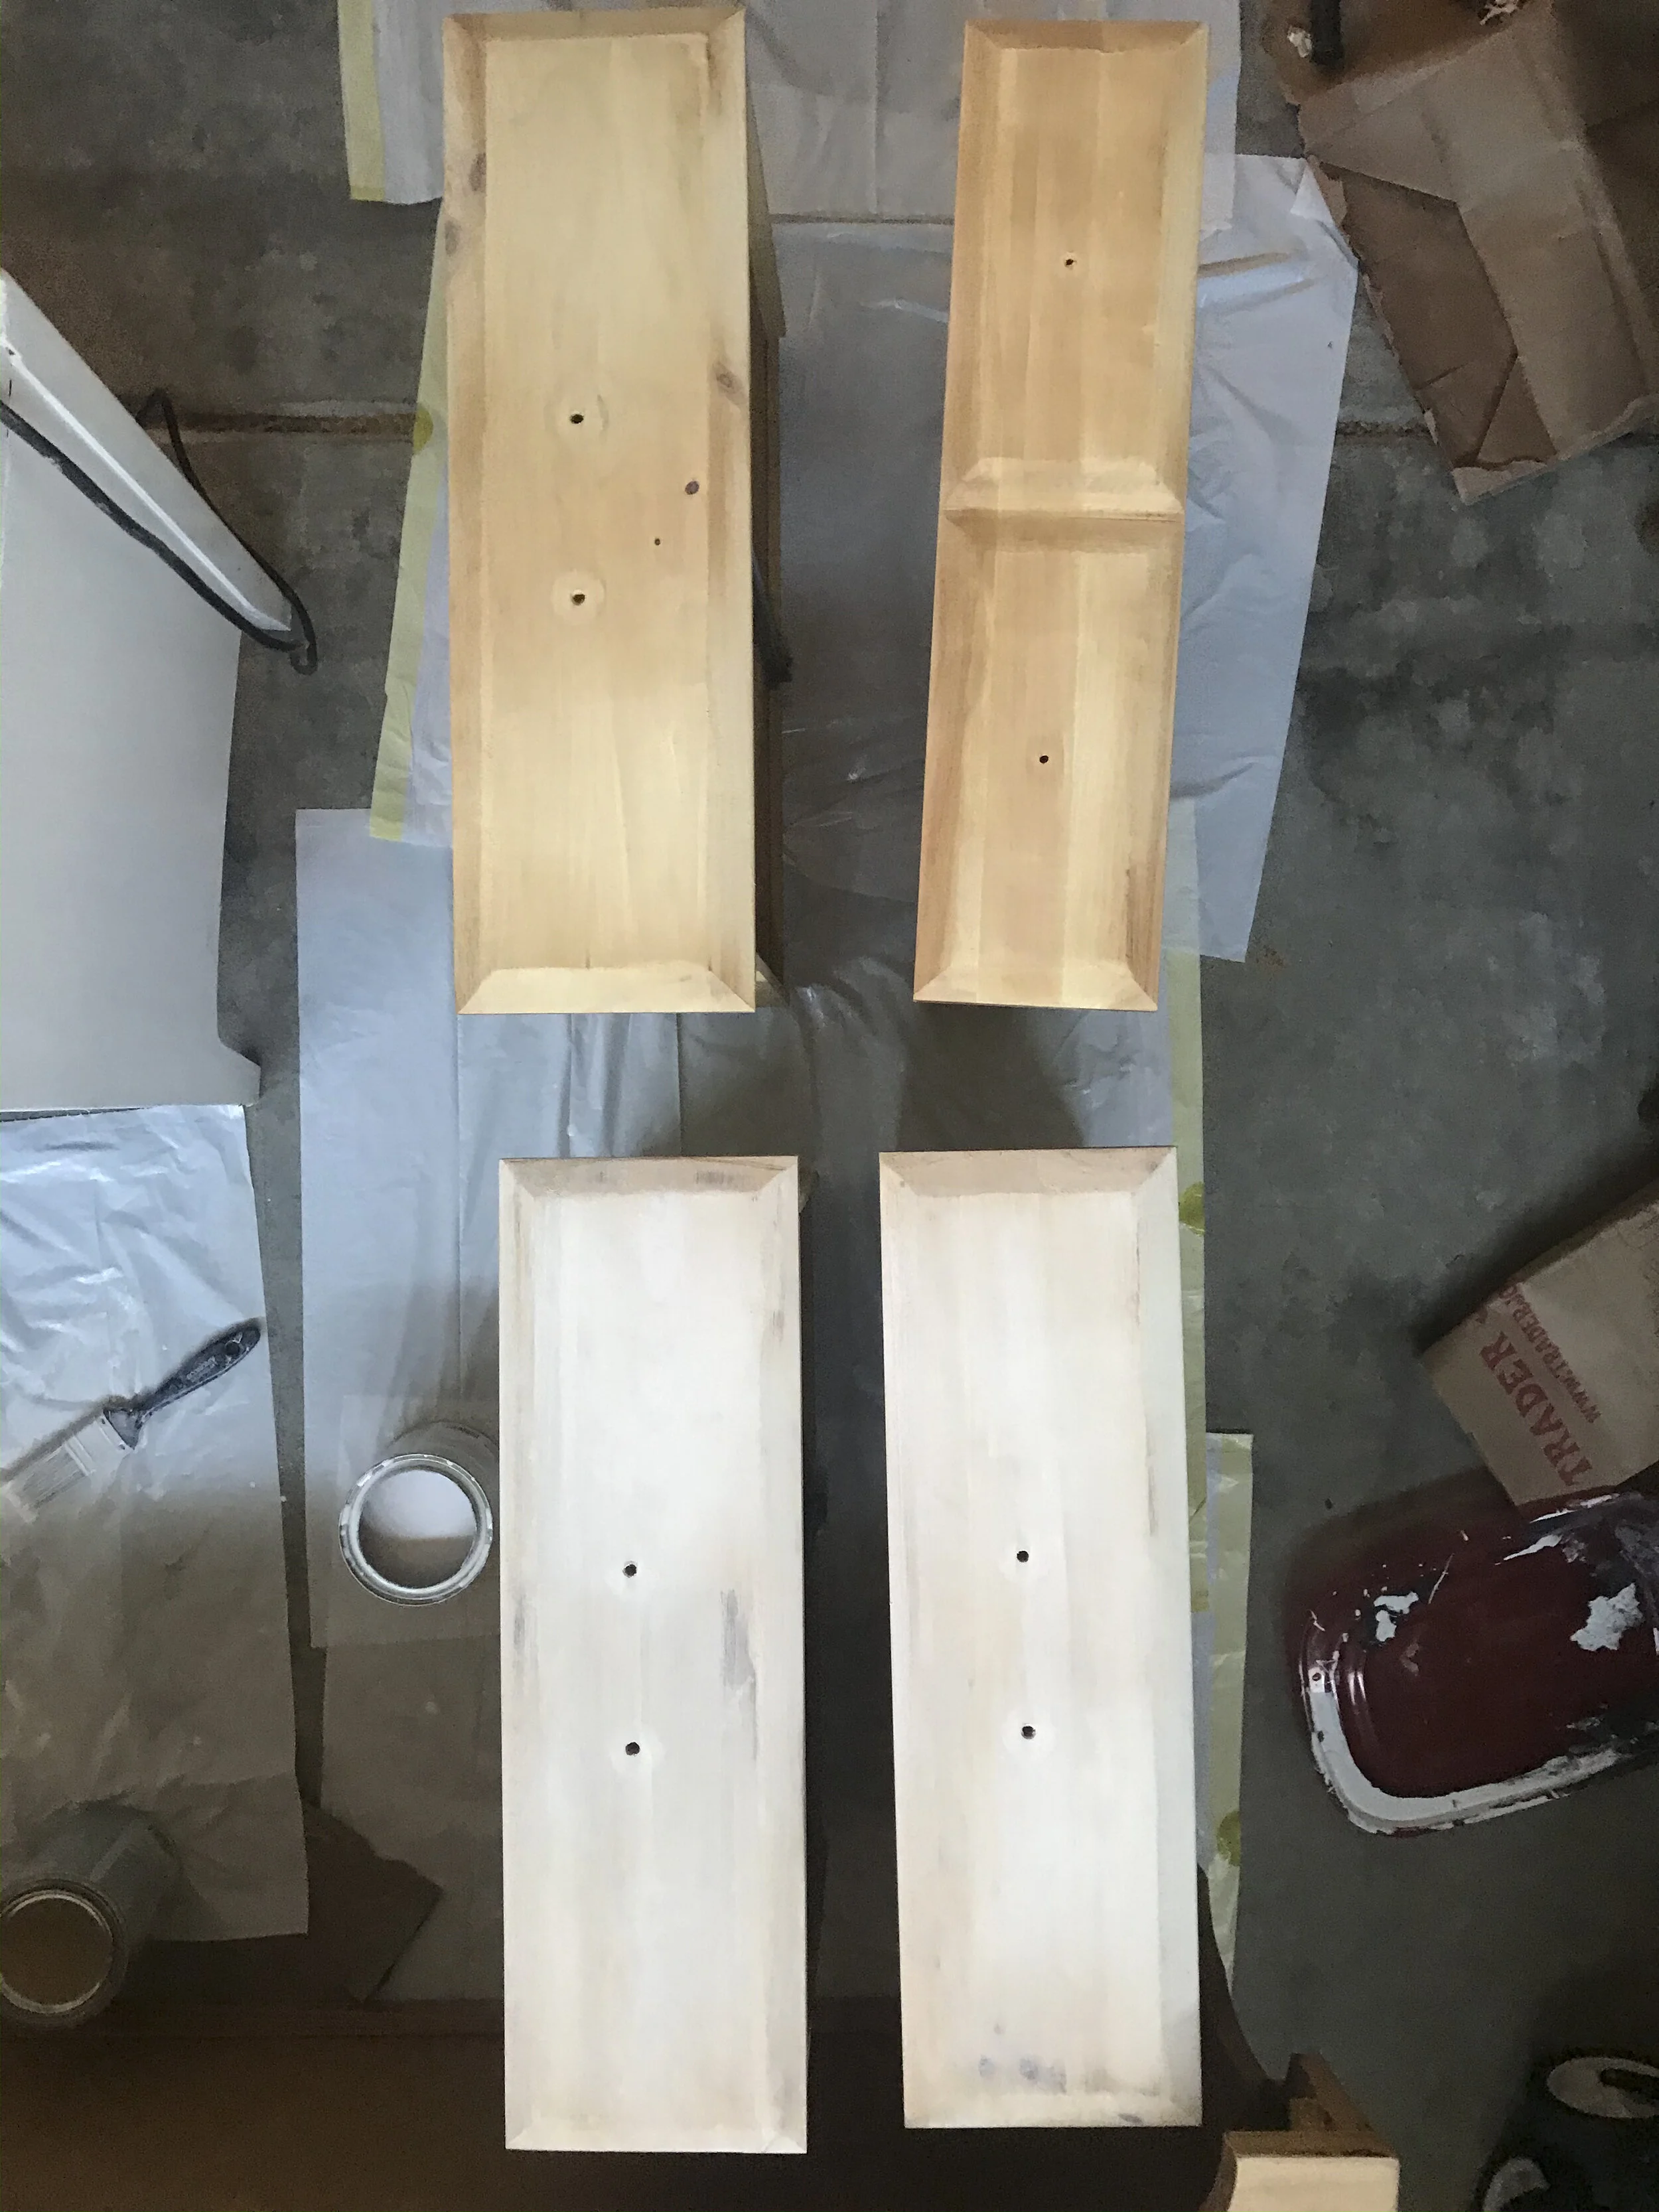
These are the drawers before and after the white stain! The final color looked kind of in-between these two.
STEP-by-step:
SAND OFF THE TOP LAYER: I recently bought this electric sander because it saves so so much time on projects like this. It was $65, but you can also rent them from Home Depot for really cheap. To sand off the existing layer, you’ll want to start with a coarse sand paper. If it’s real wood and working properly, it’ll only take a minute or two before you start to see the fresh wood below.
SMOOTH IT OUT: Once you’ve sanded everything off and you’re down to the material you want, run over all of it again with a finer sand paper, and then one more time with a super fine sand paper by hand. I didn’t realize what a difference this would make — it felt so much better and more professional after sanding it with the very fine paper.
WIPE + VACCUM: Make sure it’s all clean before you apply stain, and there’s no sawdust sticking to it.
APPLY A THIN LAYER OF WATER-BASED WHITE STAIN: This will lighten up the wood — you should lighten it a little bit more than the color you want to end with. Since the clear coat and wax can darken it, starting lighter will get you to the color you want in the end. I just brushed on one layer of stain and wiped it off immediately with a cloth as I went. Most standard stains are oil-based, so make sure to look for one that is water-based instead! Let this dry before the next step — I waited 24 hours.
APPLY WATER-BASED, CLEAR, MATTE POLYURETHANE: Water-based polyurethane should keep the wood from darkening as much! I found that this one hardly darkened it at all. Apparently oil-based is more likely to darken it. I just brushed it on with a paint brush!
SAND EVERYTHING AGAIN: Just to get things really smooth, and to avoid any paint brush texture, I used that same ultra fine sand paper all over everything!
WAX IT: This last step isn’t totally necessary, but made it feel just a little more finished and professional! I just squeezed some wax onto a cloth and rubbed it all over the dresser. This did darken the color, especially around the edges/details of the drawers, but this time in a good way!
WHAT TO DO WITH LAMINATE: Since I couldn’t stain the laminate parts of the dresser, I decided to paint them white. I followed these same steps but used paint instead of stain. I gave the laminate parts a light sand by hand just to give the paint a surface to grip onto better, and used a roller to make the paint smoother! I did 3 layers of white paint, and made sure to let each layer dry plenty in between to avoid the paint getting chunky/flaky as it dried (it’s just like painting your nails, gotta wait for the first coat to dry).
HARDWARE: Last step was just changing out the knobs and handles! I saw sooo many amazing handles that I really wanted to use on this, but I was trying to keep it really cheap. I found 4 mismatch knobs in the clearance bin at Anthropologie, and used some brass handles that I already had from another project! Make sure you pay attention to the handle size if you’re using pre-drilled holes. Some are 3 inches apart, some are 4 inches, etc.
The knobs were from the in-store Anthropologie clearance bin, and the drawer pulls were from Home Depot (I don’t see them online anymore!), but here are some other knobs and pulls that I loved and considered!
CLICK TO SHOP:


