
DIY Nativity Advent Calendar Felt Board with Cut Out Pattern
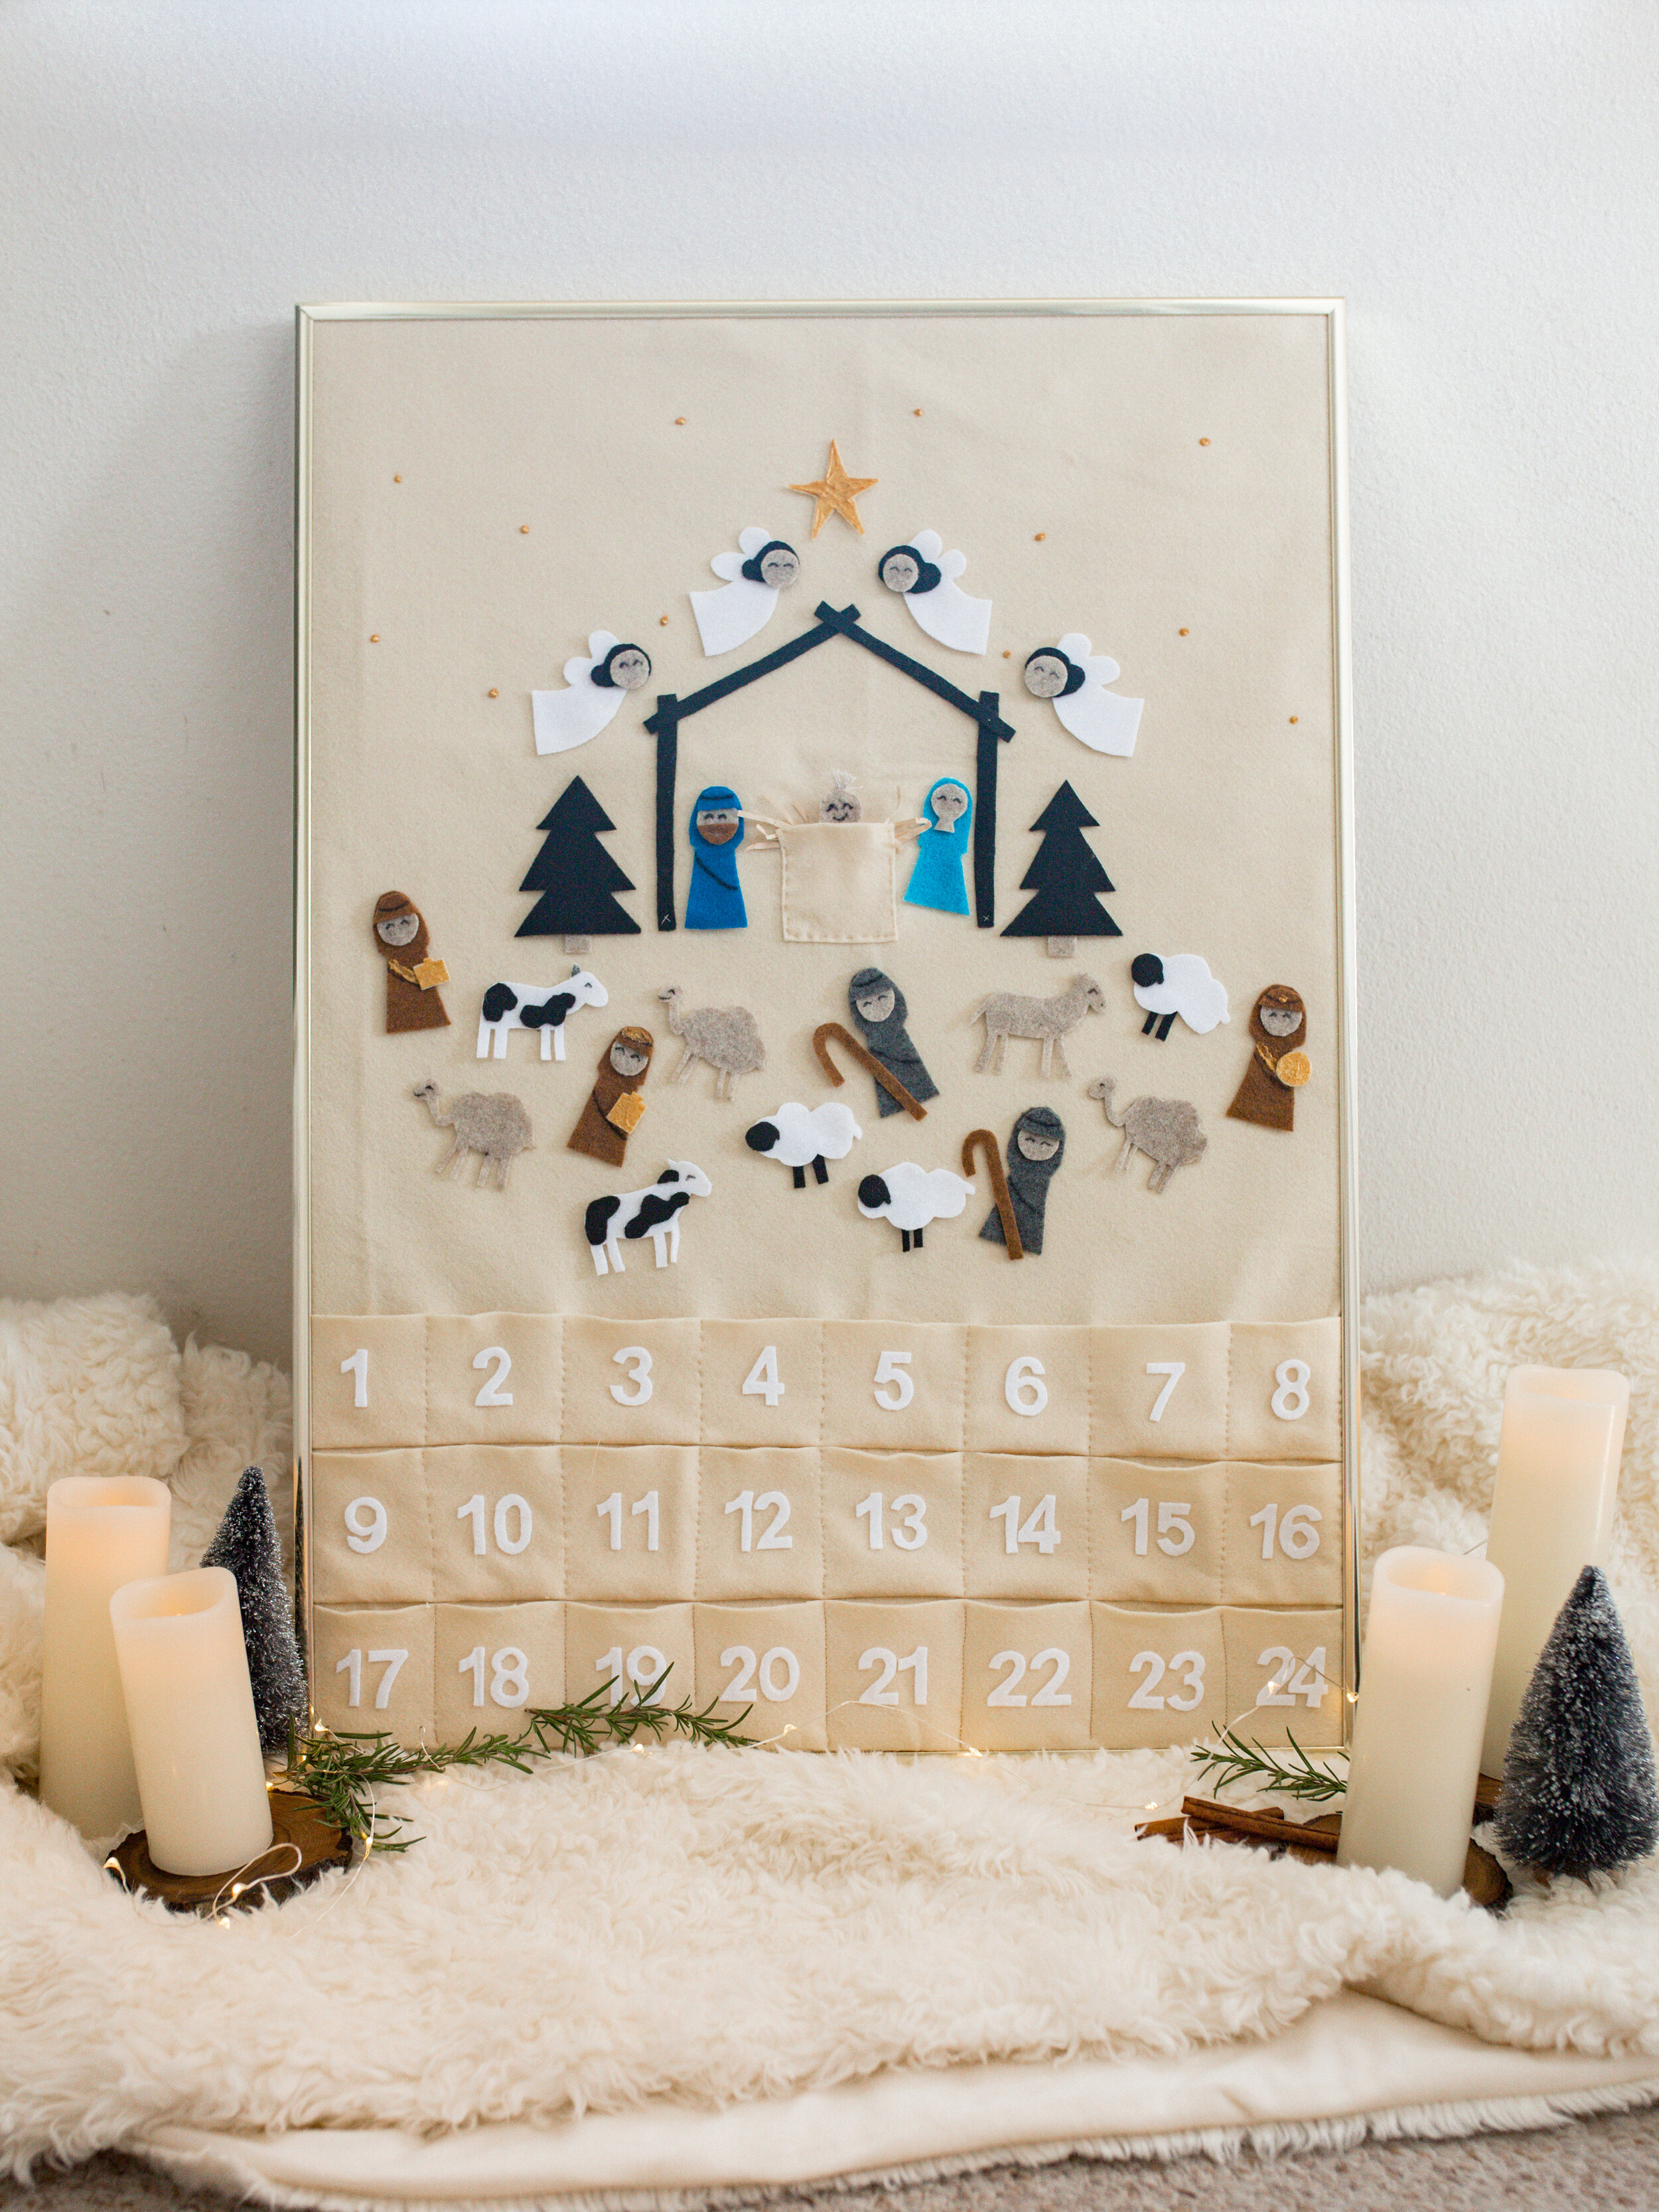
Growing up, my family had a fabric nativity advent calendar and I remember it feeling SO special when I was little to finally put Jesus in the manger on Christmas eve. Over the years, somehow the tradition turned into sisters hiding Baby Jesus from each other around the house, and to this day we hang the fabric Christmas scene on the wall in my parent’s house every year, joke about Jesus’s floofy hair and hide him from one another, sometimes adding funny things like sunglasses, arms, etc.
This year I was really craving something nostalgic to celebrate the holiday. With everything feeling so different right now, I wanted something to feel familiar, childlike, simple, and I wanted to find a way to bring my faith back into my Christmas decor and traditions (it was feeling a bit commercialized around here!) I couldn’t find a similar nativity advent calendar that I loved (though I considered this one and just found this cute one today) so, I decided to DIY!
This Felt Board Nativity Advent Calendar was really cheap and fairly easy! It was time consuming, however, so I made a pattern for you! You can print and cut out these shapes, pin them to your fabric and use them to cut each shape more quickly rather than trying to trace out your own! Hopefully this will make it a bit faster for you if you decide to make it!
(I didn’t use these exact shapes because I was just experimenting on my own, but this should get you pretty close to the same style mine was!)

Here are the basic steps:
Cut out the background felt
you’ll want to measure this to be a little bigger than your frame, so that it has plenty of extra to fold around the back and secure itself in).
I used a frame I already had that is not available anymore unfortunately. It is 20 x 28 inches.
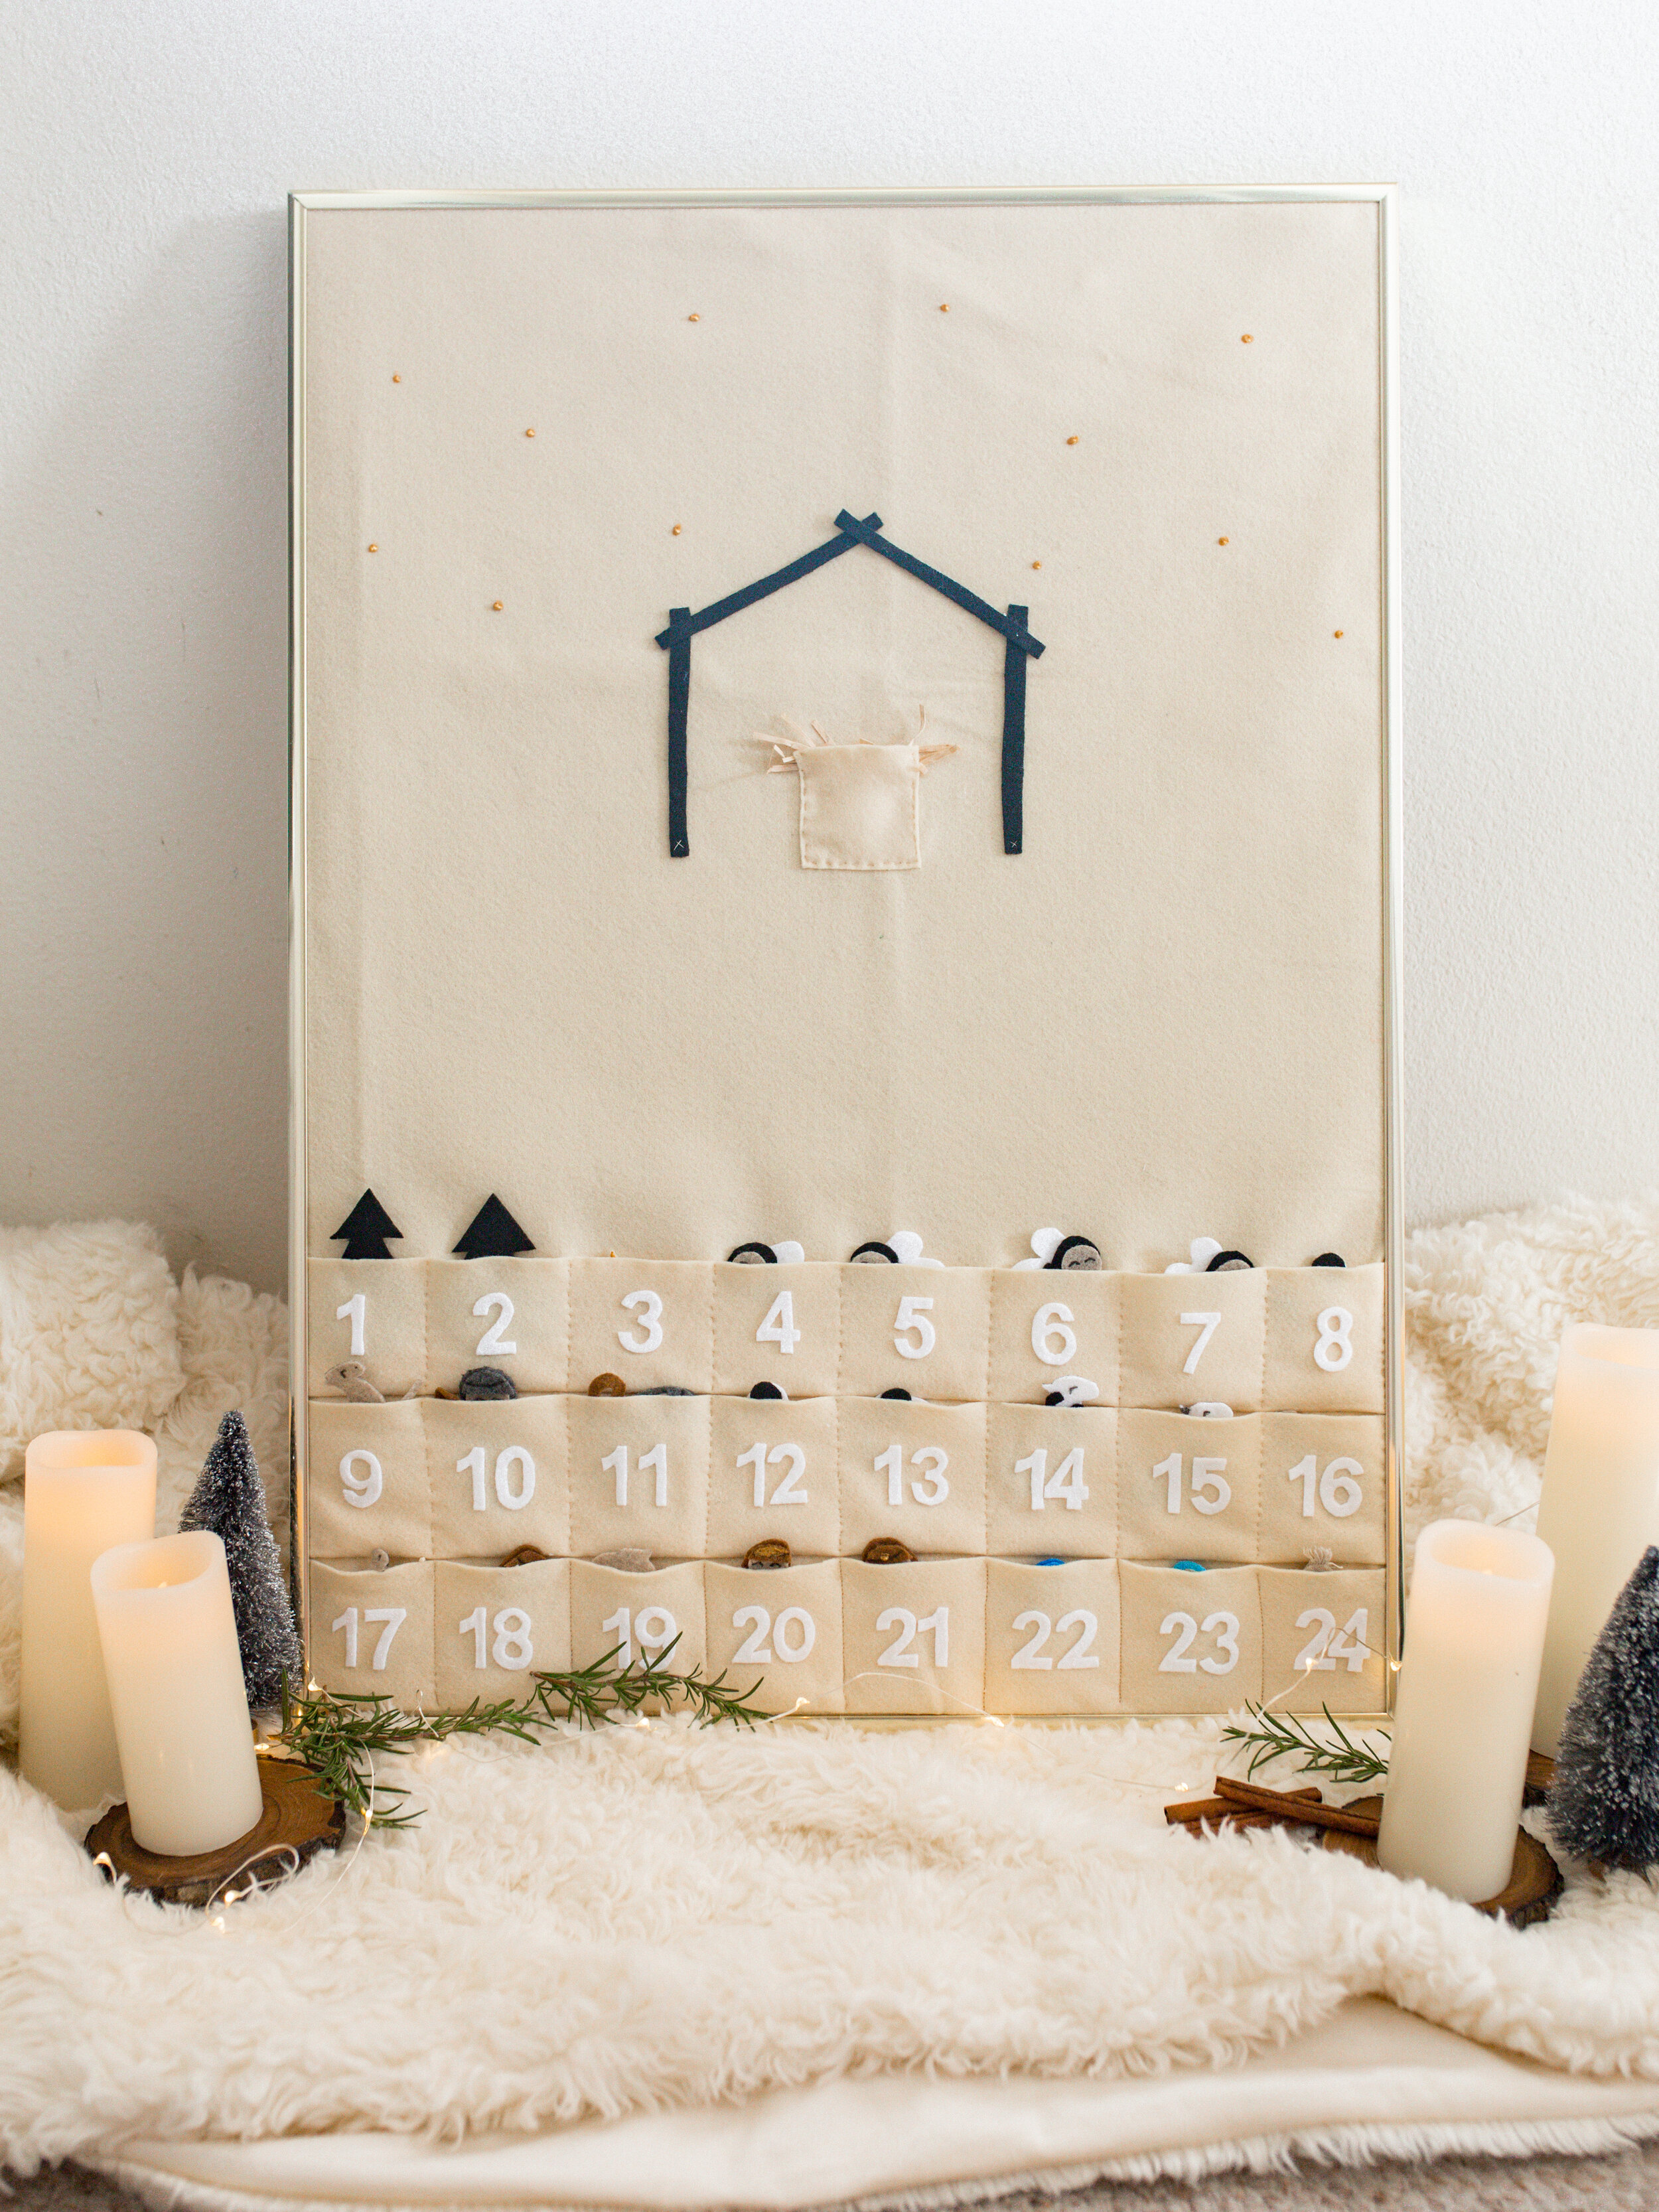
Cut three strips to the width of the background felt for pockets
you may want to leave a little extra to make your pockets slightly looser and not completely TIGHT to the board, so that you can fit the pieces inside)
Iron everything!
It will be hard to iron out wrinkles after you have glue and paint etc on it (I made this mistake).
Measure out the pockets to fit 8 on each row.
Sew the bottom of the pockets first (you can fold under like I did and sew that first, or you can put the stitches on top like I did for Jesus’s pocket, which was also cute).
Then sew the ends and the dividers between each pocket.
My standard sewing machine needle couldn’t handle the thickness of the felt. I ended up hand sewing the pockets, but if you want to use a machine just make sure you have the proper needle. I believe size 11 or 14 would work?
Cut out all the felt pieces on whatever colors you choose!
I used these colors from Michaels: Antique White, White, Sandstone, Copper Canyon, Neon Blue, Peacock, Black and Smoke.
I cut my own numbers by tracing the downloadable pattern included above. It was pretty challenging, so you could also consider buying these from Etsy for only $5!.
Glue the pieces together
I used Mod Podge! Or Elmers glue should work fine. The glue soaks into the felt a little, and it dries clear, so the more glue the merrier. I had to touch up some pieces afterward that weren’t sticking perfectly.
Draw on the faces
I just used a black pen. It would probably be best with a thin sharpie.
Add any fun accents like 3D Fabric Paint, straw, hair, etc.
I used this paint for the wisemen gifts/outfits and the star. I also added little gold dots in the sky to look like other stars.
I added straw to the manger using hot glue— I kind of wish I had just done straw out of felt because I’m worried over time this will just break off.
I added hair on Jesus by cutting the end of a piece of soft rope, fraying the end apart and hot gluing it on the back
Put it in a frame!
You can shop all the supplies I used here! This was such a fun project and I’m excited to add it to our own family traditions and make some memories around it! Please send me a pic if you make one!! I would love to see your versions!
